Liquid Language Use Cases & Examples
User-Friendly Date Formats
In our first use case, we’ll utilize Liquid Template Language liquid filters to display a date in its most user-friendly form using date filters.
For example, let’s imagine we are inserting an offer’s expiration date into the wallet pass. In our database, our expirations are formatted as yyyy-mm-dd. However, we’d like our customer to see mmmm d, yyyy.
-
To set the expiration date, you have passed a date through the SmartLink when distributing the pass. The variable we have set as the expiration date is
exp_date. See it in the link below: -
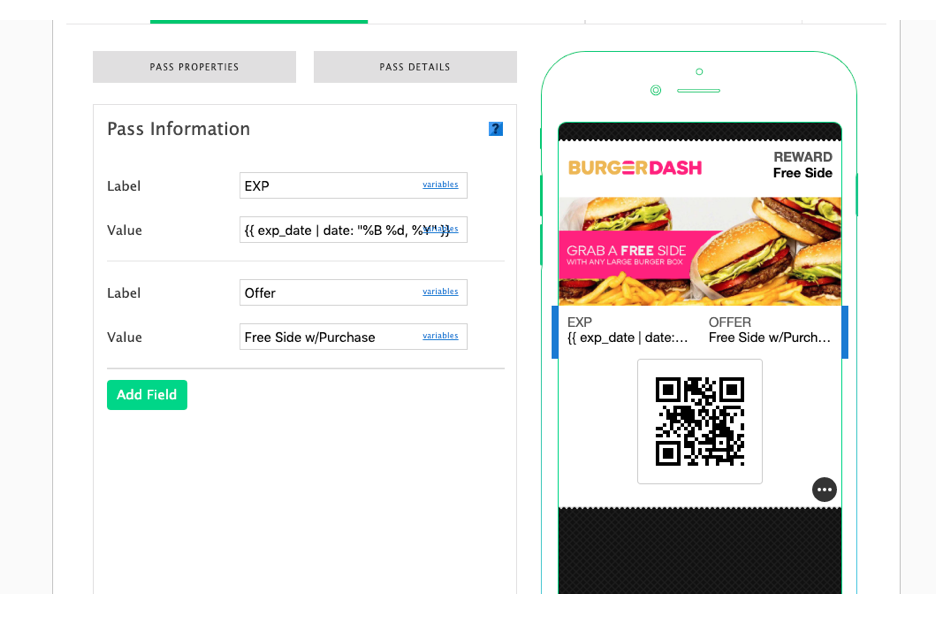
On the wallet pass, we have added a label/value pair to display the
exp_datevariable. To format the expiration date, we have included a filter. The tag looks like this:
{{ exp_date | date: "%B %d, %Y" }}
-
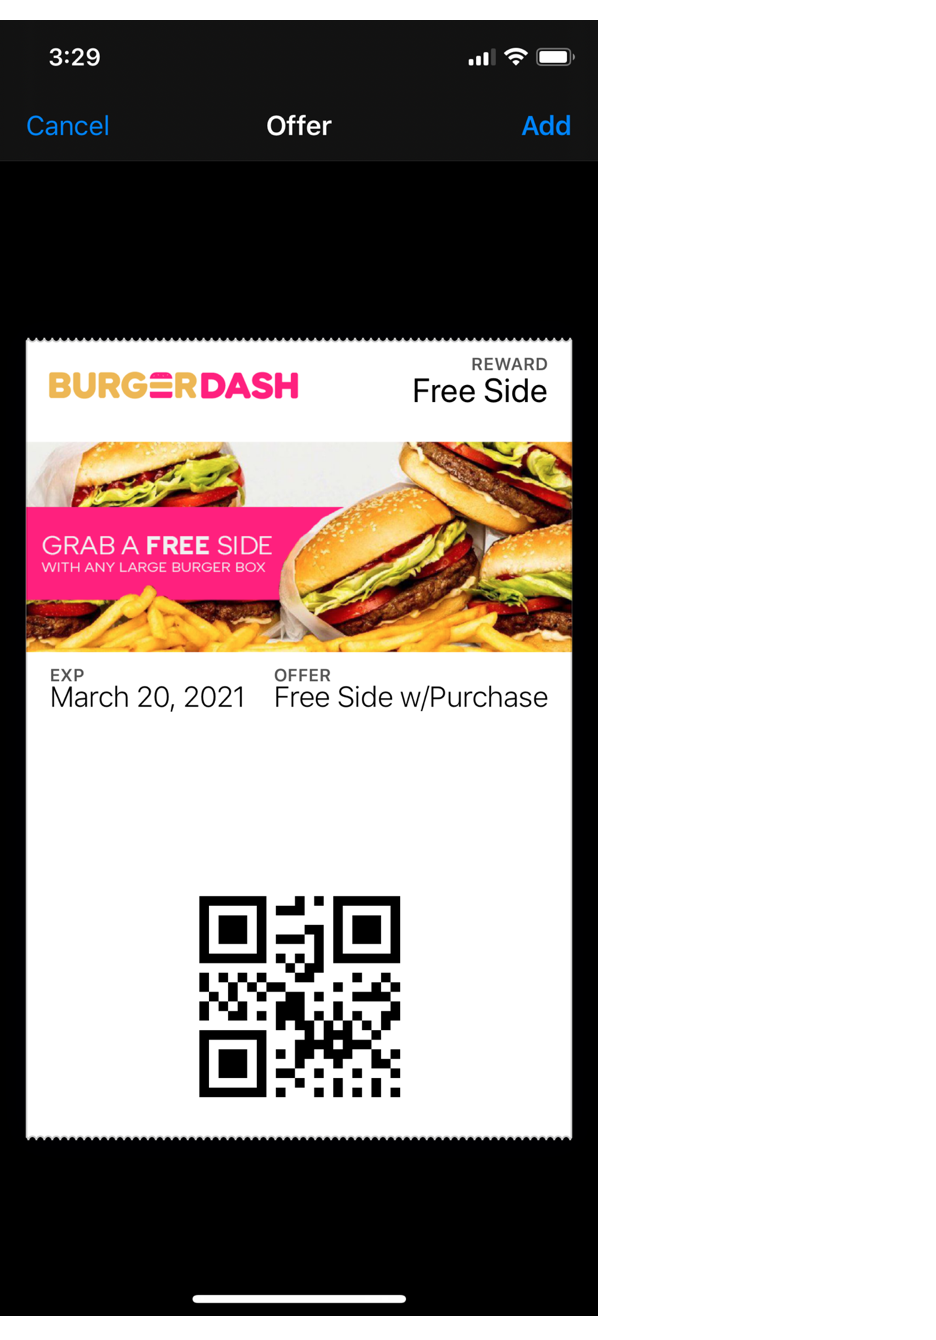
Even though the date format in the original SmartLink URL was yyyy-mm-dd, the output would appear in our filtered format as:

Formatting for International
Another common use case is editing date formats for specific regions of your audience.
For example, say you are launching a campaign in both the U.S. and Canada. In the U.S., you know that dates are typically formatted as mm-dd-yyyy, while in Canada, the date is usually written dd-mm-yyyy. To address this, you decide to set up a unique campaign for each country.
- For the American campaign, the variable is:
{{ exp_date | date: "%m-%d-%Y" }} - For the Canadian campaign, you use:
{{ exp_date | date: "%d-%m-%Y" }}
When the end user opens their wallet pass, it will be localized for the country they are in.
Rolling Expiration Dates
A rolling expiration date is an expiration date that is relative to the date the user adds their pass to their phone. For example, say you'd like to send a coupon that will expire in 30 days. While you could simply set the campaign's expiration date to 30 days from the send date, some customers may not add their pass the same day it is sent. To ensure every customer has 30 days to use the offer, you can add a rolling expiration date.
Using tags in Wallet Manager
One way to add a rolling expiration is to create an expiration date field to be displayed directly on your pass. Rather than using the {{ expiration_date }} tag, which will display the campaign's expiration date, you will create your own label/value pair that displays your coupon's expiration date.
To do so, follow these steps:
- On your wallet pass, add a label/value pair. You can add the "now" tag to populate the date the pass was added to the end user’s device.
{{ "now" | date: "%d-%m-%Y" }} - However, the above tag will just render the current date, not the expiration date. To add 30 days to the current date, we’ll turn 30 days into an equivalent number of seconds, then add those seconds to the date. The end results looks like this:
{% assign seconds = 30 | times: 24 | times: 60 | times: 60 %}
{{ "now" | date: "%s" | plus: seconds | date: "%a, %b %d, %Y" }} - Paste the string above into the value field for your label/value pair.
When the end user adds your pass to their device, 30 days will be added. For example, if the pass is added to the phone on Thursday, Feb 20, 2020, the expiration date on the pass displays as Sat, Mar 21, 2020.
Using SmartLink data in a broadcast
You can also override the expiration date of a wallet pass by passing the expiration date through the SmartLink when distributing it via broadcast. To do so, follow these steps:
- On your wallet pass, create a label/value pair. In the value field, add the following tag:
{{ expiration_date | "%B, %d, %Y" }} - To distribute this wallet pass, create a broadcast. After adding the wallet pass's SmartLink to the message body, add the following data to the Secure Link section.
data[expiration_date]={{ current_date | plus: "30 days" }} - When the end user adds the pass to their wallet app, the SmartLink data will override the {{ expiration_date }} tag with new data. The new expiration date will be 30 days in the future.
Note that when passing information through SmartLink, we do not need to convert to seconds.
Incentive Pools
You can also use these Liquid Filters in conjunction with incentive pools, which offer promotional incentive codes to users.
When the tag is used, the liquid filter uses the wallet pass’s unique identifier to identify the person record associated with that customer. If the person record has previously been issued a code from this pool, it will retrieve and display that same code. If they have never received a code from the indicated pool, the system will retrieve a new code, if any are available.
Adding a code to a pass
-
To add a code from a specific pool, you’ll need the pool's
pool_id, which can be found in the UI when you navigate to the incentive pool in the platform. To identify thepool_id, simply look at the URL:
-
When you add the liquid tag to the pass, it should look something like this:
{{ incentive_code | pool_id: 12 }} -
When the user opens their pass, they will see a unique code pulled from the pool for them.
Avoiding duplicate codesIf you add the tag in the SmartLink URL and on the wallet pass, two unique codes will be generated. Because more unique codes are being generated than necessary, this may cause the codes in your pool to be quickly depleted.
As a best practice, if you are using SMS to distribute your pass, we recommend using the variable
{{ code }}where you’d like the code to display on the wallet pass. Then, add logic to the SmartLink, such as:
data[code]={{ incentive_code | pool_id: 12 }}
Limited supply
Let's say that your business wants to issue 1000 codes to the first 1000 customers to add the pass. For everyone else, you’d like to include a message to try again next time. Inside of the Incentives tab of our platform, you've already uploaded a CSV containing 1000 unique codes.
To add a message to users without an assigned code, simply add a default value to your tag. After the pool is out of codes, the default message will display.
Example:
{{ incentive_code | pool_id: 104678 | default: "Better luck next time!" }}
Dynamic MMS Images
Liquid tags are a good way to personalize your content to individual customers. In this scenario, we’ll explain how you can use liquid tags to add personalized images to your API-triggered MMS campaigns.
-
Create your event-triggered campaign. When you get to the
media_urlstring, instead of inserting of a static media URL to send to every recipient, insert the following tag:
{{ev.media_url}}If you’d like to include a default fallback URL, you can format it as:
{{ ev.media_url | default: “[INSERT URL HERE]” }} -
Then, when you send the triggering event to the system, be sure to include the following string field:
”media_url”: “[INSERT URL HERE]” -
That’s it! The media URL from the event will be used to insert an image in your event-triggered MMS send.
Formatting Notes
- If you are using a default url, do not forget the “” around the default URL.
- While you can use a tag to set up your campaign, you cannot insert a liquid tag into a partial URL. See the example below of a URL that cannot be used:
- NOT VALID:
https://example.com/{{ev.media_url}}
- NOT VALID:
Updated 12 months ago