Geolocation-Triggered Notifications
Both Android and iOS support geolocation-triggered notifications for their wallet passes. These notifications are surfaced on a customer's lock screen whenever the device containing those passes gets within a certain distance of the specified area(s)—in general about 100 meters.
More information on these features can be found on Apple and Google's mobile wallet documentation.
iOS vs. Android
Temporarily unavailable notificationsGoogle has temporarily made geofenced notifications unavailable for a majority of users while they make platform improvements. View more information on Google’s website.
While both operating systems allow for geolocation notifications, there are a few main differences:
Content
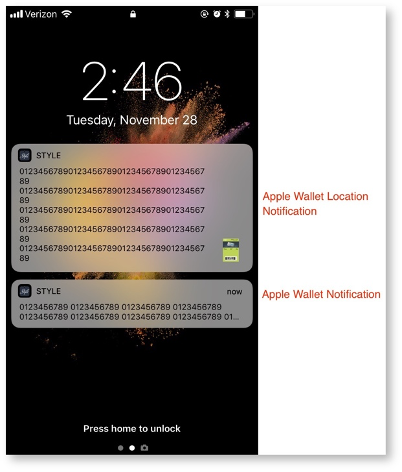
iOS allows for up to 10 lines of custom text on any given location-based notification. Android does not allow for custom text on location-based notifications.
Apple Wallet Sample
Google Wallet Sample

Notification surfacing logic
iOS geolocation-based notifications will display on the devices lock screen when a customer comes with 100 meters of the location. There is no limit to how often a geolocation notification is presented on a customer's iPhone.
Android's location-based notifications will trigger within 150 meters. Google Wallet only allows 4 total notifications per day. If multiple passes are available in any given location, a carousel will appear and the customer can swipe between the passes.
Maximum locations
Android allows for an unlimited number of locations to be associated to a mobile wallet pass, but for performance reasons, we recommend not exceeding 10,000 locations for Google Wallet passes.
iOS, on the other hand, only allows for a maximum of 10 locations to be associated to any one mobile wallet pass.
Geolocation Scenarios
To bridge the gap between functionality, Vibes allows for a few different ways to establish geolocation notifications for a given wallet pass.
Option #1: 10 total locations
If you know the locations that you’d like to add to the campaign, you can add up to ten locations manually in the platform. Note that these ten locations will be the same for everyone who downloads the wallet pass from this campaign, so it’s not ideal for national campaigns.
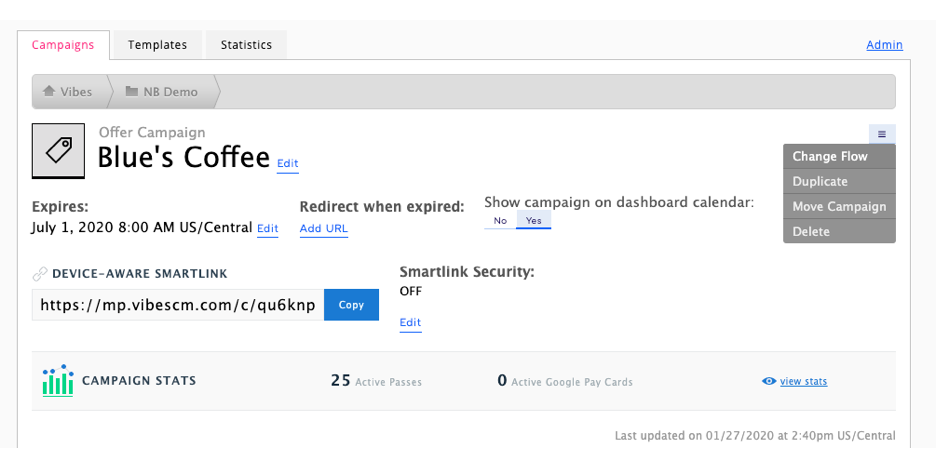
When you create the campaign, you’ll want to make sure the Location Selector toggle is switched off. You can also reconfigure the flow after creation by selecting “Change Flow.”

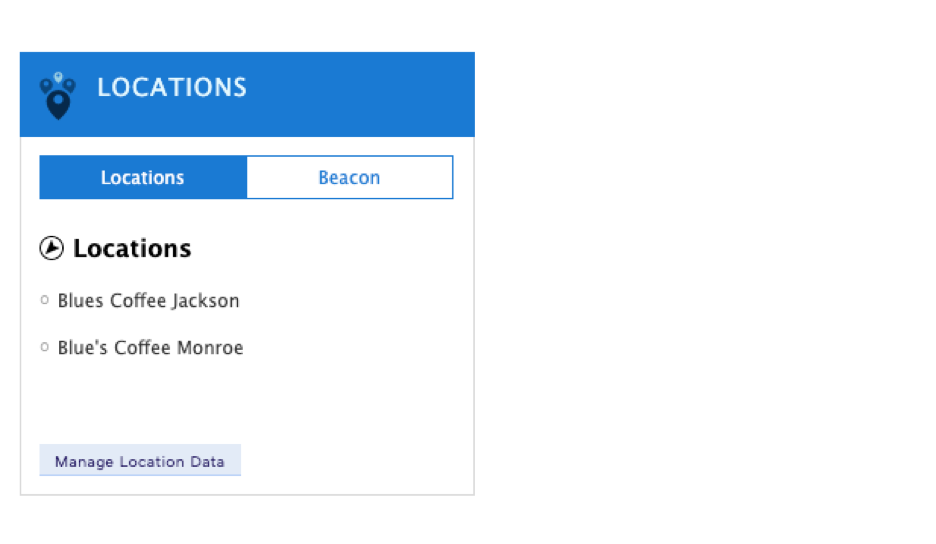
Once the campaign is created, you’ll see an option for locations, as shown below:
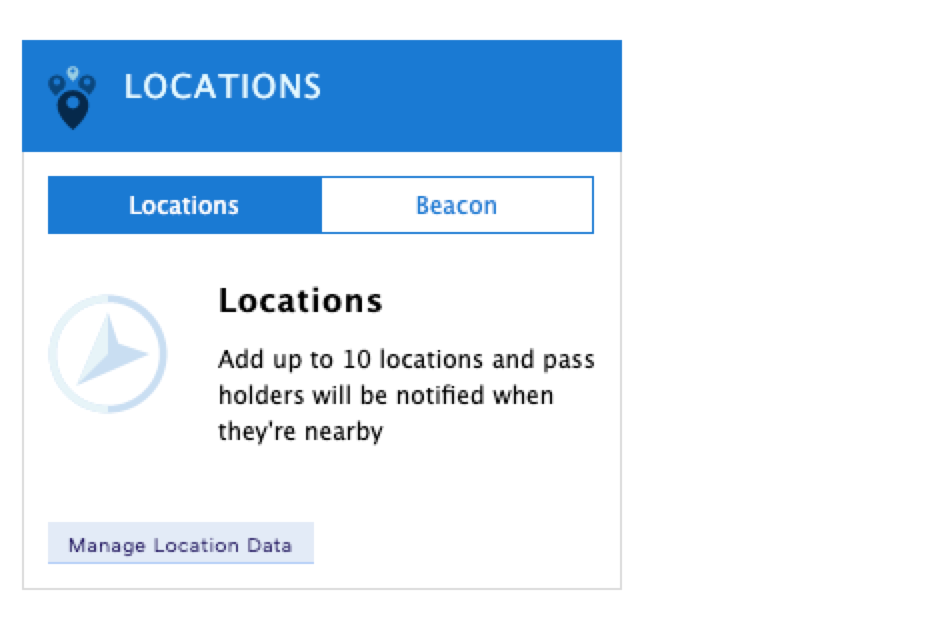
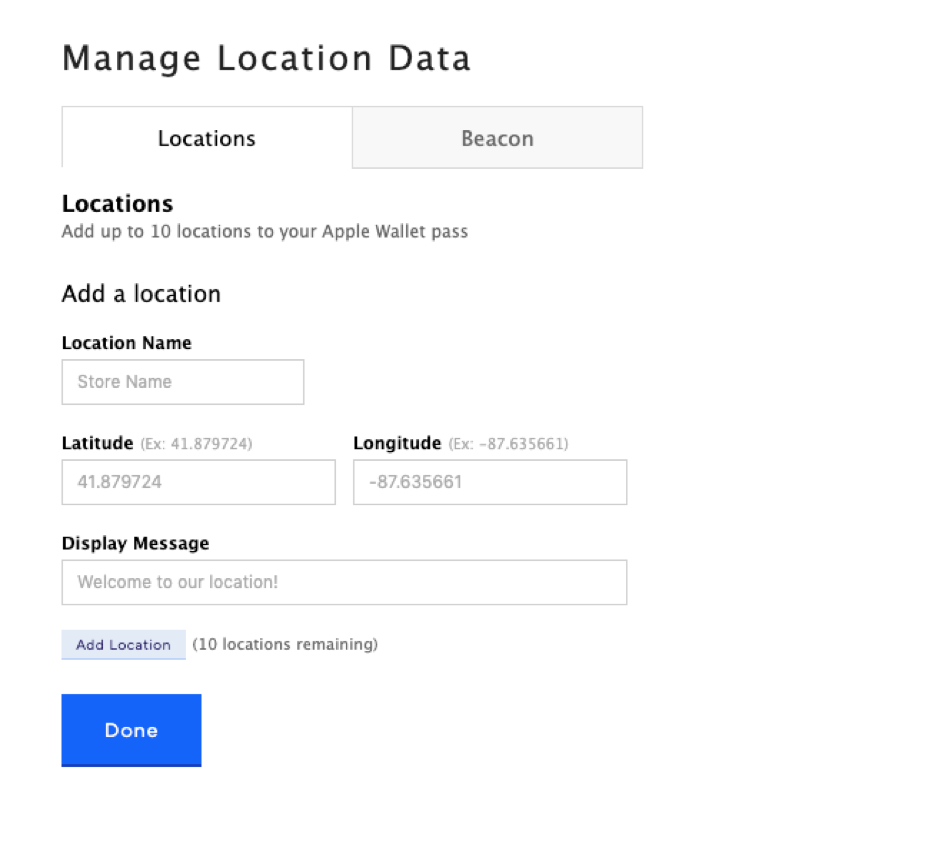
When you select “Manage Location Data,” you’ll have the option to add each location using its latitude and longitude. You can also name the location and add a location-specific message.
Option #2: Location selector
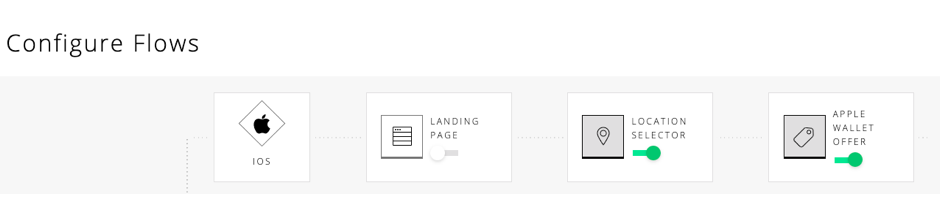
If you have more than 10 locations, you may want to give your end user the option to select the locations that are most relevant to them. To do so, you’ll need to make sure the location selector is toggled on for iOS during the “Configure Flows” step:
If you’d like to change an existing campaign, you can also do so inside the platform. Once you’re in the wallet campaign, select “change flows.”
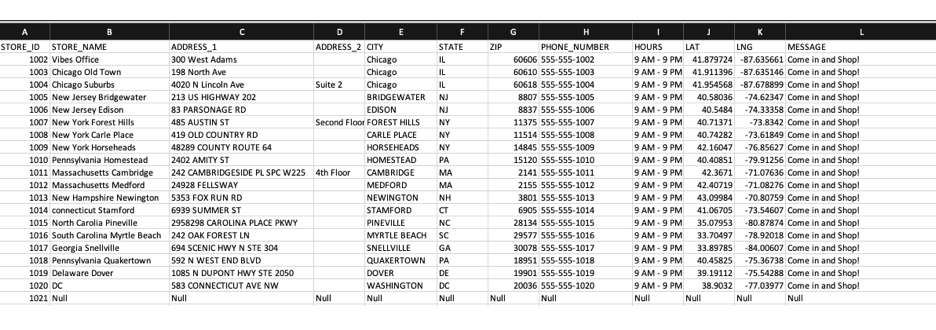
Once the flow has been configured, an additional option will surface in the Wallet Manager on the "Locations" module, allowing you to upload an excel list of locations and notification copy. Note that this is the only way to add new locations to a campaign. While you can update locations via API call, new locations can only be added in the UI.
An example list of locations can be downloaded here.

Customers on Android will now have all the locations uploaded here associated to their mobile wallet pass. iOS customers will be presented with a page before adding the pass that lets them search by geolocation and presents them with locations nearby to include on the pass.
You can remove locations by uploading a new locations file. In this file, within the row of the "STORE_ID" you want removed, replace all the values except "STORE_ID" with "Null" (see STORE_ID 1021 in the example photo below).
Option #3: Bypass location selector with zip code
If you’d like to automatically add the 10 closest locations to an iOS customer’s pass, you can also bypass the location selector using the customer’s preferred zip code.
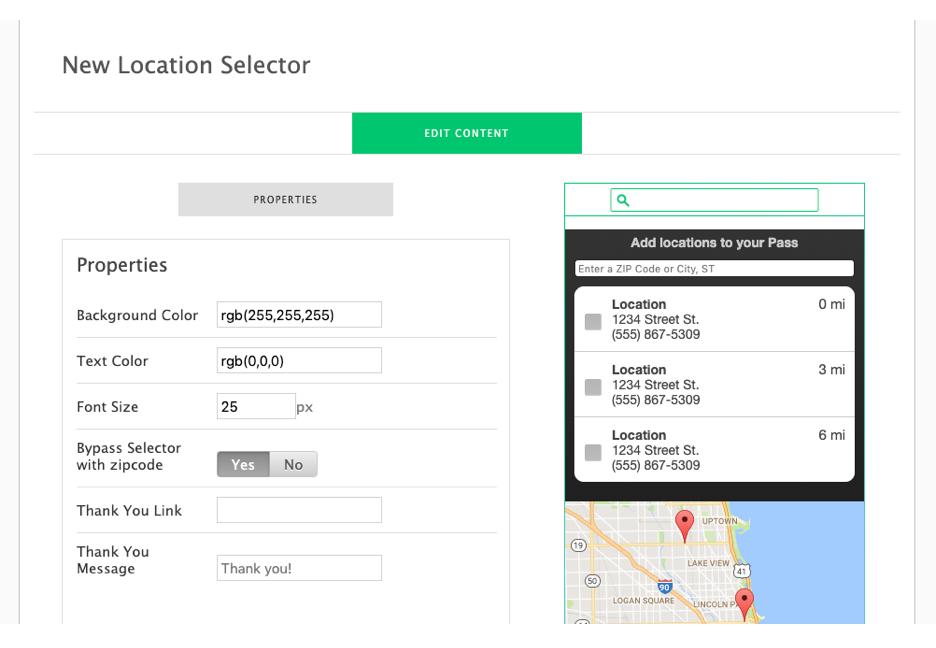
To configure this option, you should still have the location selector toggled on in the wallet campaign flow page. However, make sure that within the location selector page options, the “bypass location selector with zipcode” set to "yes.”
A “Thank You” page URL or a “Thank You” message must also be added in this case, in the event a zip code is not provided in the URL.
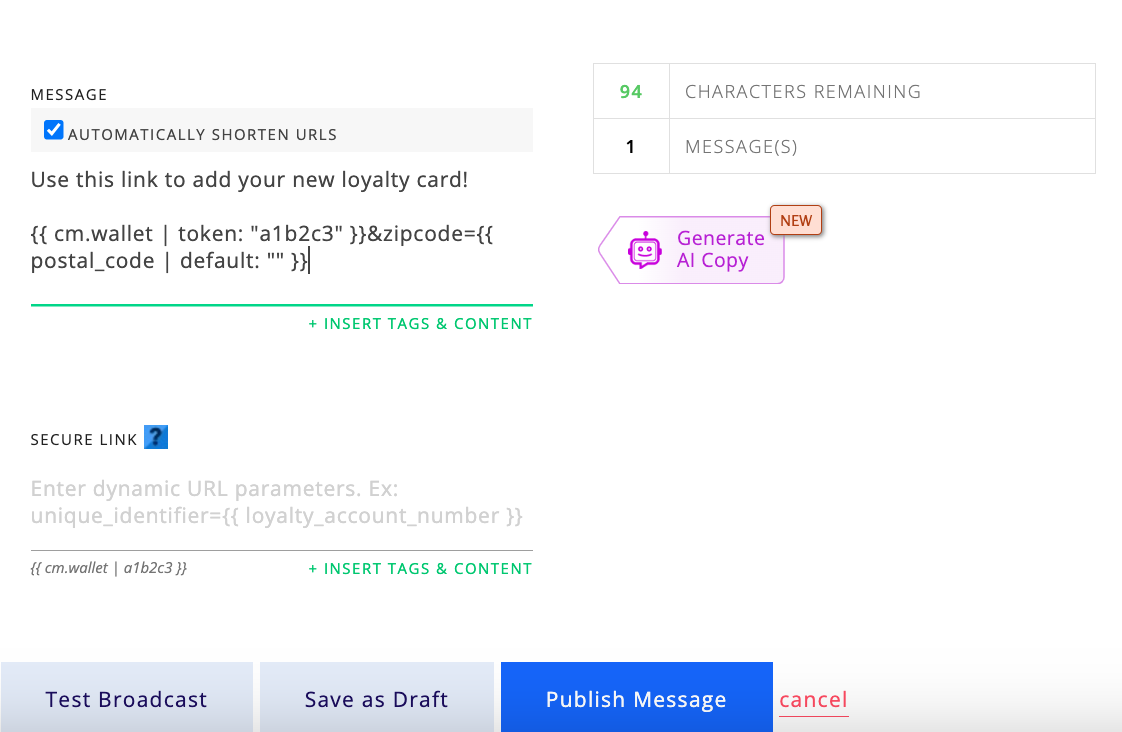
Then, when you send out your SmartLink via broadcast, you’ll want to include the customer’s preferred zip code with the wallet token.
To do so, simply add the preferred zip code to the wallet token in the message editor. It should look like this:
{{ cm.wallet | token: "a1b2c3" }}&zipcode={{ postal_code }}

When this information is included, the customer will not see the location selector page, and instead, the 10 nearest locations within a 100-mile radius will be added.
Like with any other tag, you can also include a default zip code for users who do not have zip code data. However, you can also include a blank default to let the user who do not have zip code data to choose locations using the location selector. The token will look like this:
{{ cm.wallet | token: "a1b2c3" }}&zipcode={{ postal_code | default= "" }}
Here is an example:
Option #4: Lat/long coordinates
As extra parameters in the SmartLink URL, you can add each location by including the location's coordinates and the message content. Please remember to abide by browser limitations on total character length for a url.
Below is an example of how to place the coordinates and message content on a pass:
Note: This functionality is not available when sent via a broadcast.
Option #5: Using Wallet Campaign API
If you have granular data on customer location and plan on sending custom location-based messaging, you should consider using the wallet campaign API to add locations and message copy to wallet items individually.
Remember: custom geolocation-based notification copy is only supported by Apple - Google's location-based copy is static and cannot be edited.
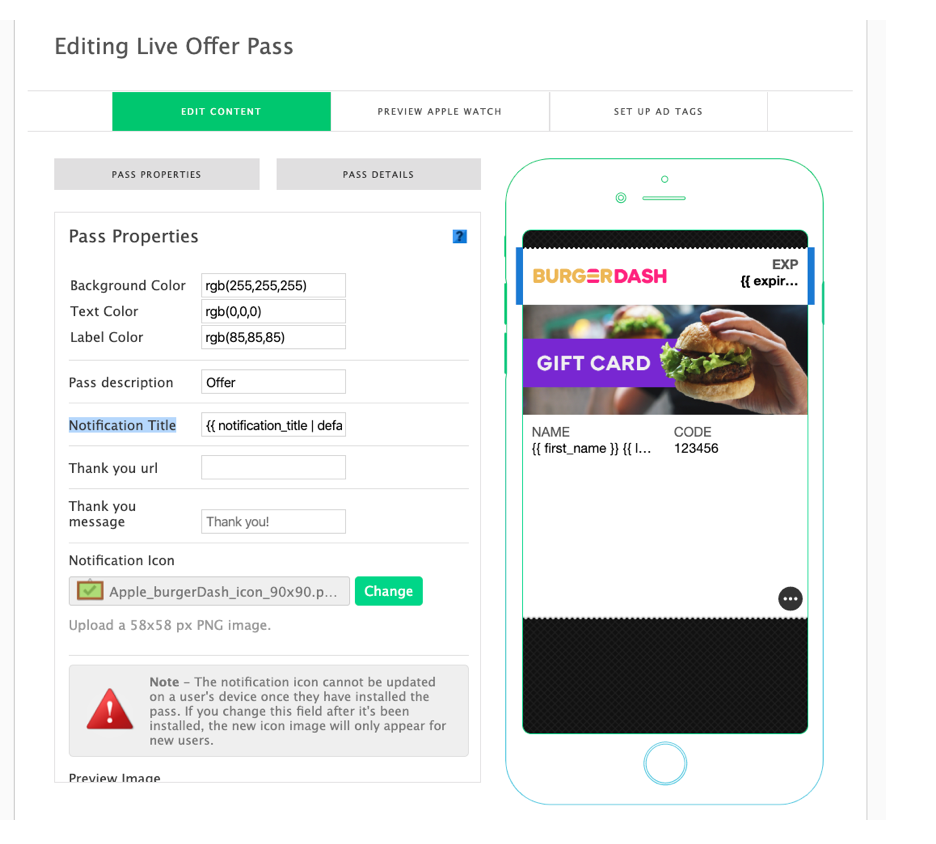
You can add the latitude and longitude data, along with the geolocation-triggered message (which is placed in the "relevant text" field) within the "location" section of the pass body using update wallet item method. If you have made the notification title a token in the wallet manager in platform, you can also include dynamic content for the geolocation notification title.
Use the following to update a specific wallet pass (the wallet_item_id is the unique identifier).
PUT /companies/:company_key/campaigns/wallet/:wallet_id/items/:wallet_item_idSee the example below:
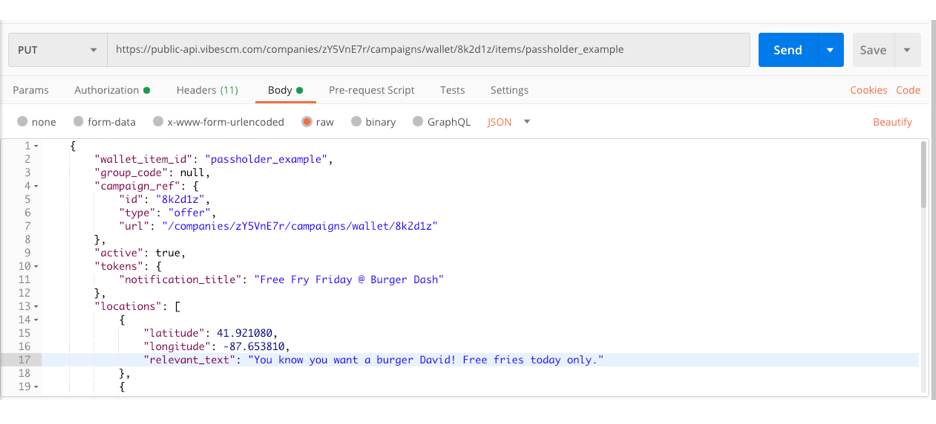
In that image, there are two important values. The "locations" section of the wallet item body and the token field labeled "notification_title." Remember that we used notification_title as the token name in the platform settings above for this example, but this could be any name that made sense for your campaign.
With both of those specified, the pass notification will appear once that specific pass comes within range of those lat/long coordinates.

Updated over 1 year ago