Installing the iOS Push Notifications SDK
The following documentation shows you how to install the iOS Push Notifications SDK. You can install the iOS Push Notifications SDK by using dependency managers or by manually integrating it.
Requirements
- iOS 10 - iOS 15
- Xcode 9.0 - Xcode 13.0+
- CocoaPods 1.1.0+
Swift Version Support
The SDK is Swift version dependent. You will need to verify the deployment target matches that of your application target. Ensure that the Swift Version (from Build settings) of the VibesPush target is supported in the version you cloned.
| SDK Version | Swift Version Supported |
|---|---|
| 4.5.3 | 5.0 |
| 4.4.0 | 5.0 |
| 4.3.0 | 5.0 |
| 4.2.0 | 5.0 |
| 4.1.0 | 5.0 |
| 4.0.0 | 4.2 |
| 3.3.0 | 4.2 |
Dependency Manager
CocoaPods
CocoaPods is a dependency manager for Cocoa projects that you can use to install the Vibes Push Notifications iOS SDK.
- Install CocoaPods using the following command:
$ gem install cocoapods
- Verify that it is properly instead installed using this command.
$ pod --version
- If your app is using tracking identifiers, you will have already included AdSupport.framework.
- Integrate VibesPush into your Xcode project using CocoaPods by specifying the following in your Podfile.
platform :ios, '9.0'
use_frameworks!
pod 'VibesPush', '4.5.3'
- Run the following command to install the library:
$ pod install
Carthage
Starting with versions 3.2.0, you can also use Carthage to install our SDK.
- If you do not have Carthage installed, use either of the methods below to install:
- Using Homebrew (http://brew.sh/)
brew install carthage - Downloading Carthage.pkg installer from https://github.com/Carthage/Carthage/releases
- Using Homebrew (http://brew.sh/)
- After Carthage is installed, create a Cartfile in your project root directory and add the following line in your Cartfile.
github "Vibes/push-sdk-ios" == 4.5.3
- Run the following command:
carthage update --platform iOS
- Open the folder Carthage on your project root directory and navigate into Build/iOS. Drag the VibesPush.framework into the Linked Frameworks and Libraries section in Build Settings of your Xcode project.
Manual Installation
If you prefer not to use CocoaPods, you can integrate Vibes Push SDK into your project manually.
Embedded Framework
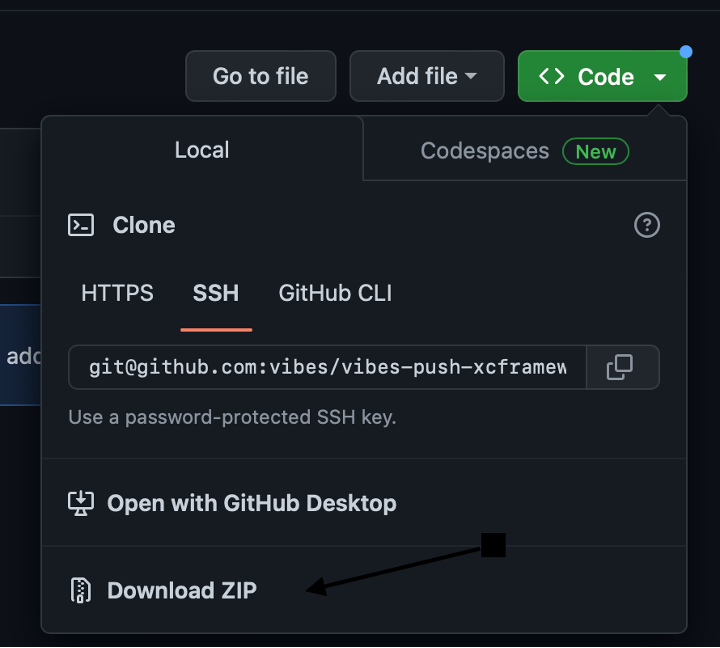
- Open up Terminal and run the following command to clone the VibesPush SDK into your local environment:
$ git clone <https://github.com/vibes/push-sdk-ios.git>
- Open the directory where you have cloned VibesPush, and drag the VibesPush.xcodeproj into the Project Navigator of your application's Xcode project.
- Select the VibesPush.xcodeproj in the Project Navigator and verify the deployment target matches that of your application target. Ensure that the Swift Version (from Build settings) of the VibesPush target is supported in the version you cloned.
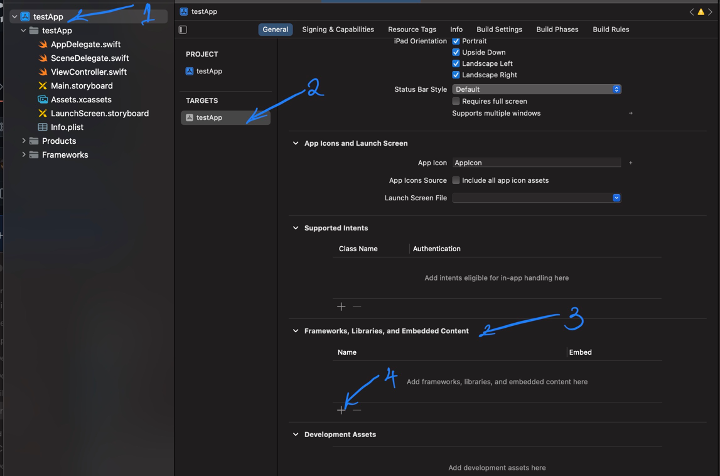
- Select your application project in the Project Navigator (blue project icon) to navigate to the target configuration window and select the application target under the Targets heading in the sidebar.
- Open the General panel in the tabbed bar at the top of the window.
- Click on the + button under the Embedded Binaries section.
- Choose the VibesPush.framework and select add.
Git Submodule
You can install VibesPush SDK as a Git submodule of your project.
- Open up Terminal, cd into your top-level project directory, and run the following command if your project is not initialized as a git repository
$ git init
- Add VibesPush SDK as a git submodule by running the following command:
$ git submodule add <https://github.com/vibes/push-sdk-ios.git>
- Open the new VibesPush folder, and drag the VibesPush.xcodeproj into the Project Navigator of your application's Xcode project.
- Select the VibesPush.xcodeproj in the Project Navigator and verify the deployment target matches that of your application target.
- Select your application project in the Project Navigator to navigate to the target configuration window and select the application target under the Targets heading in the sidebar.
- Open the General panel in the tabbed bar at the top of the window.
- Click on the + button under the Embedded Binaries section.
- Choose the VibesPush.framework and select add. The VibesPush.framework is added as a target dependency, linked framework and embedded framework in a copy files build phase, which is all you need to build on the simulator and a device.
XCFramework
- Extract the framework. It should contain the following folders:
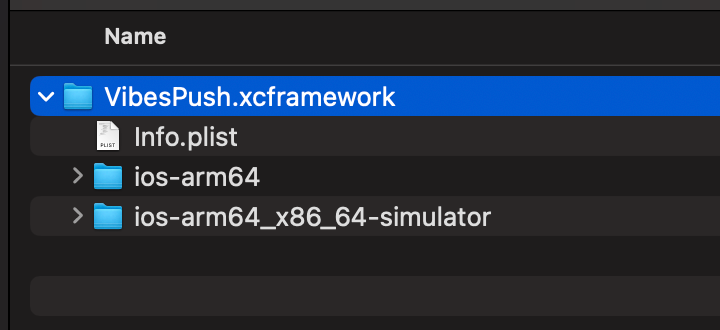
- In your project, follow the steps to import the framework in xcode.
- That's all! You can now get started using XCFramework in your project.
APNs Setup
Before integrating Vibes Push SDK into your iOS apps, there are a handful of steps you must take on the Apple side of things, which require membership in the iOS Developer Program. This is because Vibes uses the Apple Push Notification Service (APNs) as the transport method for iOS push notifications.
Vibes will typically provide you with two apps on the Vibes Platform; a test app (for sending test messages during development) and a production app (for sending messages to customers in live app). Apple provides two primary types of SSL certificates: the APNs Development iOS certificate and the Apple Push Notification service SSL (Sandbox & Production) certificate. The Sandbox & Production certificates can be used on both test and production apps, while the APNs Development iOS certificate may only be used within your test iOS apps.
When building your app using a development provisioning profile, ensure your Vibes test app is configured with the APNs Development iOS or Apple Push Services SSL certificate. To push to an app built with a distribution provisioning profile (either with a release build in Xcode, ad hoc distribution, or the iTunes App Store), ensure your Vibes production app is configured with the Apple Push Services SSL certificate.
Best practiceWe strongly suggest a clear separation between your Vibes production and test applications during the testing period. Apple treats the two servers separately, so a device token for test app will not work in the production app and vice-versa.
Creating APNs Certificates
-
Log in to the Apple Developer Member Center and go to Account » Certificates, IDs & Profiles, or use this direct link.
-
In the left side menu, click Identifiers, then click your app’s name in the list of App ID
- If you haven't registered an iOS App ID, click +, select App IDs, and click Continue:
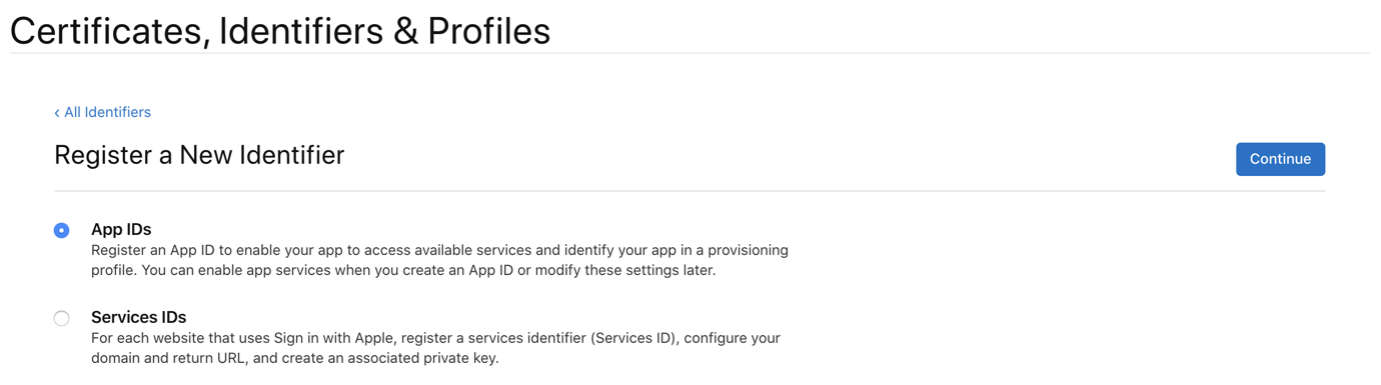
- Fill out the Register an App ID page, and be sure to check the Push Notifications checkbox, then click Continue and Register.
- Click your app’s name in the list of App IDs and proceed.
-
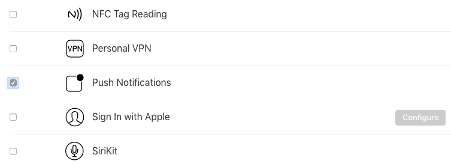
In the list of Capabilities, check the box for Push Notifications, then click Configure to continue to the Apple Push Notification service SSL Certificates. The button will be labeled Edit if it has been configured previously. Note: If the Configure/Edit button is not available, you may not have the admin rights in your Apple account, consult your team agent to fix this.

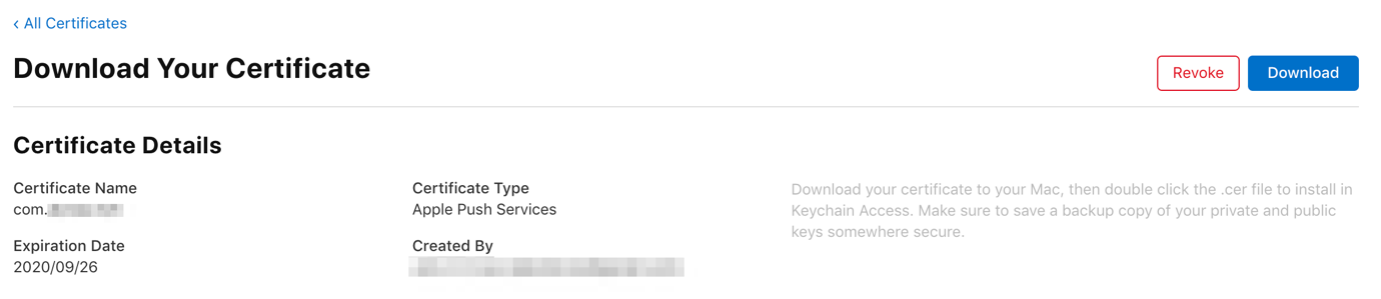
- Click Create Certificate to create a Production SSL Certificate. This will generate an Apple Push Notification service SSL (Sandbox & Production) certificate compatible with both the Production and Development environments. You should see the Create New Certificate section to generate an Apple Push Notification service SSL (Sandbox & Production) certificate:

- Follow the instructions to create a certificate signing request in the Create New Certificate section, then click Continue after your certificate signing request is uploaded. You can use your newly created Certificate Signing request to generate the APNs Push SSL certificate.
- Click Download and save the file for use in the next step Exporting APNs Certificate.p12.
Exporting APNs Certificate.p12
The final step is to save your signing certificate as a .p12 file.
- Open the certificate you downloaded in the previous steps, which should open in the Keychain Access app. The certificate will be listed in My Certificates tab.
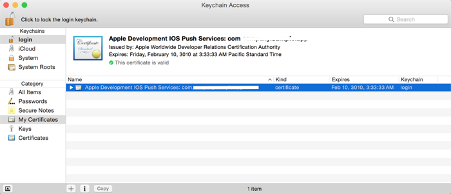
- Click the certificate in the list, then from the File menu, select Export Items.

- Save the file in the Personal Information Exchange (.p12) format which you will provide to Vibes for configuration of your application.

Configuring for Multiple Environments
Since you will test your app in a Test account before going live in a Production account, we recommend configuring multiple environments on your XCode project using XCode schemes.
XCode provides two default schemes when your project is created. A debug and a Release scheme. A Debug scheme defines how you build the app during the development. It is likely to break existing functionality. Debug schemes are typically used during development. A Release scheme on the other hand, defines how your app is prepared for an App Store release and is mostly used with the live deployment of the application. Sometimes one needs to create a new scheme for the QA testing, which is a build you want to share with your internal testers. You create this test scheme using the steps below.
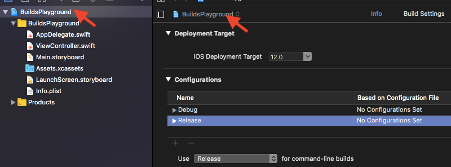
- On the Navigator (left side file viewer), click the top level project name. If target settings are shown, click the current target and change it to project to see all existing build schemes. You should see a screen that looks like below.
- In order to create a new scheme, you need to copy an existing scheme and make changes on the copy. Since our test builds are going to behave like release builds, it is logical to copy the Release. Click the button shown below.
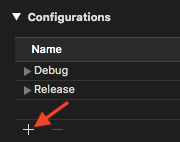
- Create a duplicate from Release and give it a name you like. You may call it Test as in our example.
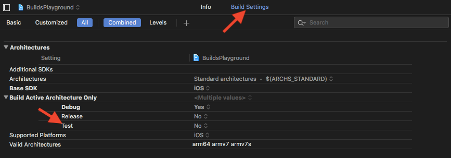
- Now navigate to the Build Settings tab, you will see that for each setting on the list that accepts multiple values, a third option named Test is automatically added. By editting these fields, we will be able to configure our newly defined scheme.
- You can define global constants in your Info.plist file, with values for each of your scheme to be accessible at runtime. Defining global constant has a unified way for Swift and Objective-C. Inside your build settings, click the button shown below and add a constant of your choice to the build.

- For instance, you can define your Vibes API URL and Vibes APP ID like below.

- Source files do not immediately see user defined configurations inside build settings. You need to include each setting inside the Info.plist file. Copy the setting name you created (i.e VIBES_API_URL and VIBES_APP_ID), add a row to Info.plist (right click -> add row) and paste it inside like this. The $() operator inherits values from current scheme’s build settings.

Updated over 1 year ago