Configuring Passes for NFC
NFC—also known as “Near Field Communication”—is the technology that allows for contactless payments and transferring data between devices. For example, you can use NFC to wirelessly redeem an event ticket or as a method of recognizing loyalty cards. Both iOS and Android support NFC-enabled passes. To learn more about NFC, please see Apple's human interface guidelines.
To take advantage of this technology, you’ll need to take steps to enable NFC for your platform account. Then, you’ll be able to configure each pass’s NFC settings in the mobile wallet pass editor.
How Do I Enable NFC for My Platform Accounts?
There are a few steps before you will be ready to start using NFC-enabled passes. First, we need to enable NFC capabilities for your Google and Apple accounts.
- Make sure that your point-of-sale (POS) terminal vendor(s) can support both Apple VAS and Google Smart Tap. These will be required for the terminals to properly decode the NFC data.
- Create a public / private key pair along with a key version, and deliver the public key to Vibes so that we can add it to your Google and Apple accounts.
- This key pair can be generated by the POS terminal provider or your business, depending on how you would like to manage these keys.
- We suggest contacting your Vibes account representative about the delivery of this public key. We suggest delivery of this value in the form of a .PEM file and sent to Vibes using SFTP.
- Each of your accounts in platform can have their own private/public key pairs, and each account may have multiple public keys.
- If your POS hardware provider has their own Google Merchant account and has an Issuer ID, and you wish to use that Issuer ID as the Redemption Issuer ID, you should also request this value from them and deliver this to Vibes along with your .PEM public key file(s).
- If you have multiple sub brands, or locations that use different POS hardware providers, you may have multiple valid Redemption Issuer IDs associated to your account.
- Vibes will then update your Apple and Google account(s), at which point we will deliver you the following data points to load onto your terminal hardware to detect these NFC enabled passes:
- Apple pass type identifier(s)
- Google collector ID(s)
- Google key version (this value is not required for Apple)
- Google issuer ID(s)
- Once these values are setup on a terminal to begin testing, you may begin designing your pass.
NFC-Enabled Pass Setup
Now that you have your account enabled for NFC, you will be able to configure NFC specific settings inside the mobile wallet pass editor.
Please note: This functionality is limited to loyalty pass templates for both Apple and Google (on iOS, enabling NFC turns the pass template type from a loyalty pass into a "store card" - the design however is the same as a loyalty pass, with the introduction of an NFC animation).
Apple Loyalty Pass Setup
In the platform, select your Apple wallet pass for editing.
If all has been configured correctly, you should see a field labeled “NFC message.” This field determines what information should be transferred between the mobile wallet pass and the POS terminal. This field must be populated with some value to enable NFC functionality (if this field is empty, clicking on the SmartLink will only deliver a standard loyalty pass).
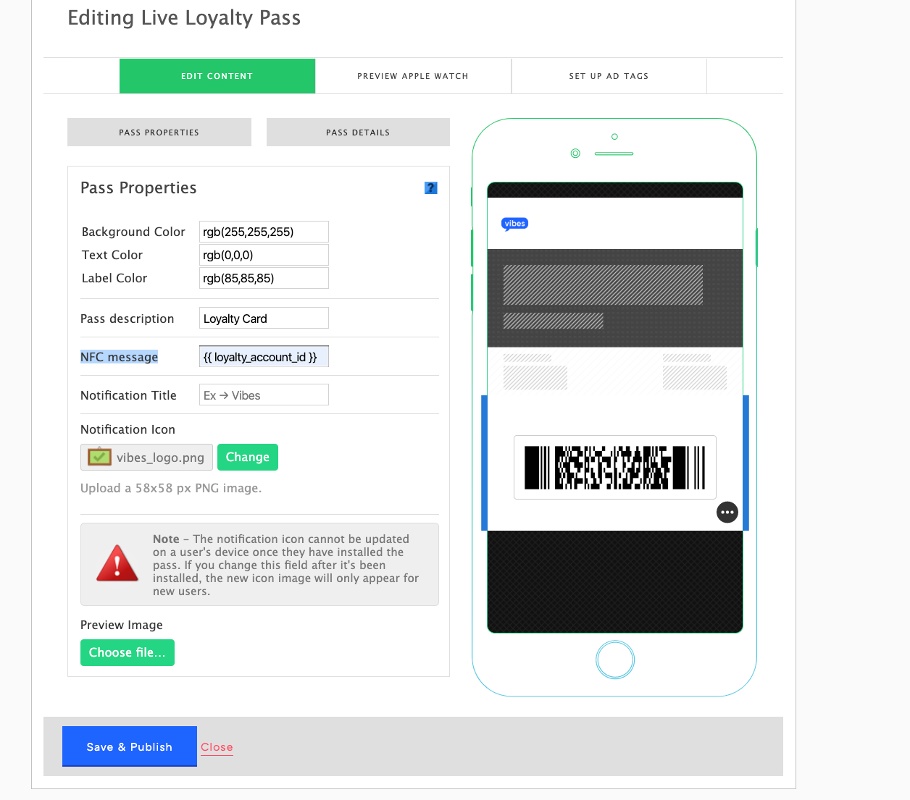
You can use any field from within the Vibes Mobile Database, or a third-party tag to populate this value. Example data could be an account identifier that you would usually place in the barcode value, such as {{ loyalty_account_id }} or perhaps their Vibes person_key ( {{ mdb.person_key }} ).
It's important to note that Apple only allows for 64 bytes worth of data to be transmitted over NFC, so anything larger than your average identifying guid may be too large.
Apple Pass Design
When the NFC message is populated on the template, and the template is published, your passes from this campaign will now include an NFC animation at the bottom of the pass instead of the traditional, laser or camera scannable barcode types:
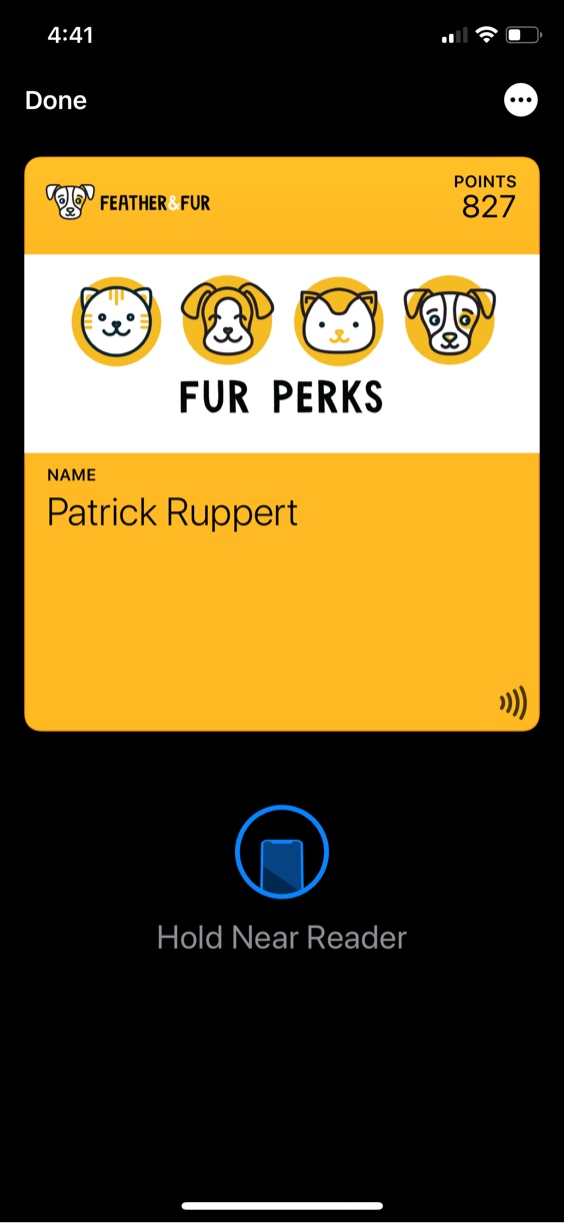
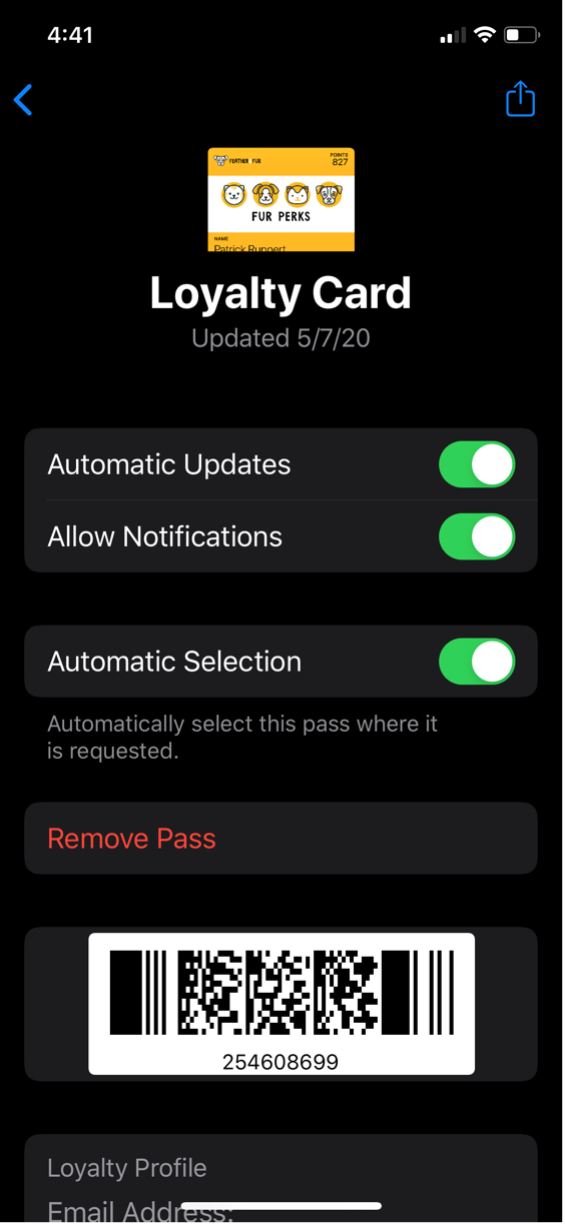
On the back of the pass, there will be a barcode value provided as a backup in the event of an issue with the NFC technology, as well as an additional option about auto selecting this pass when near NFC hardware.
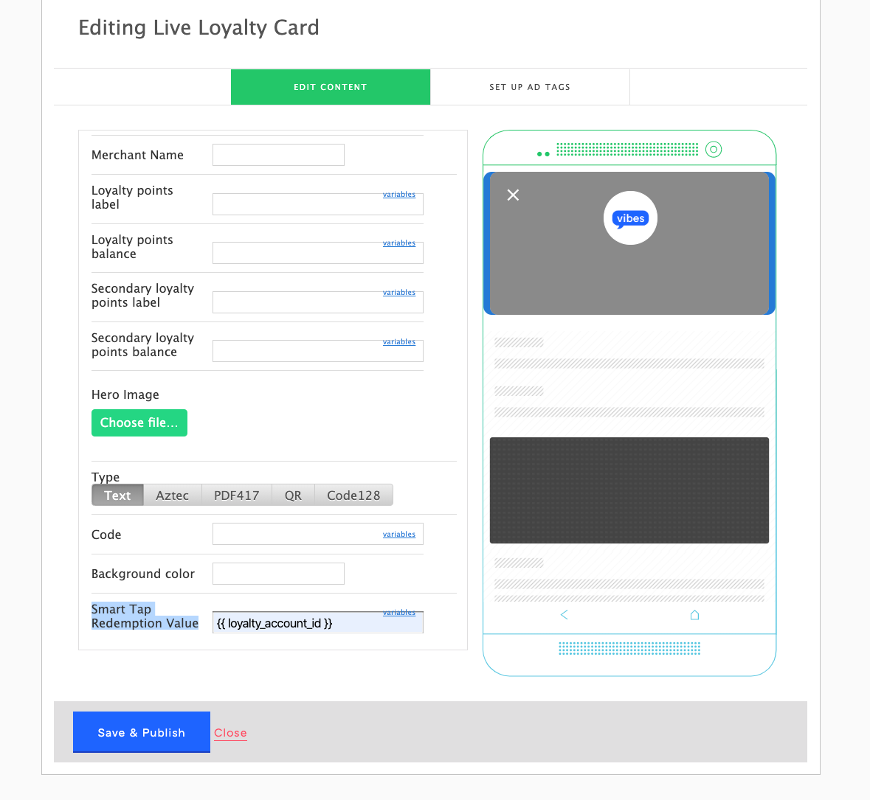
Google Pass Setup
Setting up your Android pass will follow roughly the same process as updating your iOS wallet pass with one key difference. Instead of a “NFC message” field, Google refers to this field as the “Smart Tap Redemption Value.”
You can find this field near the barcode options when editing your Android loyalty pass.
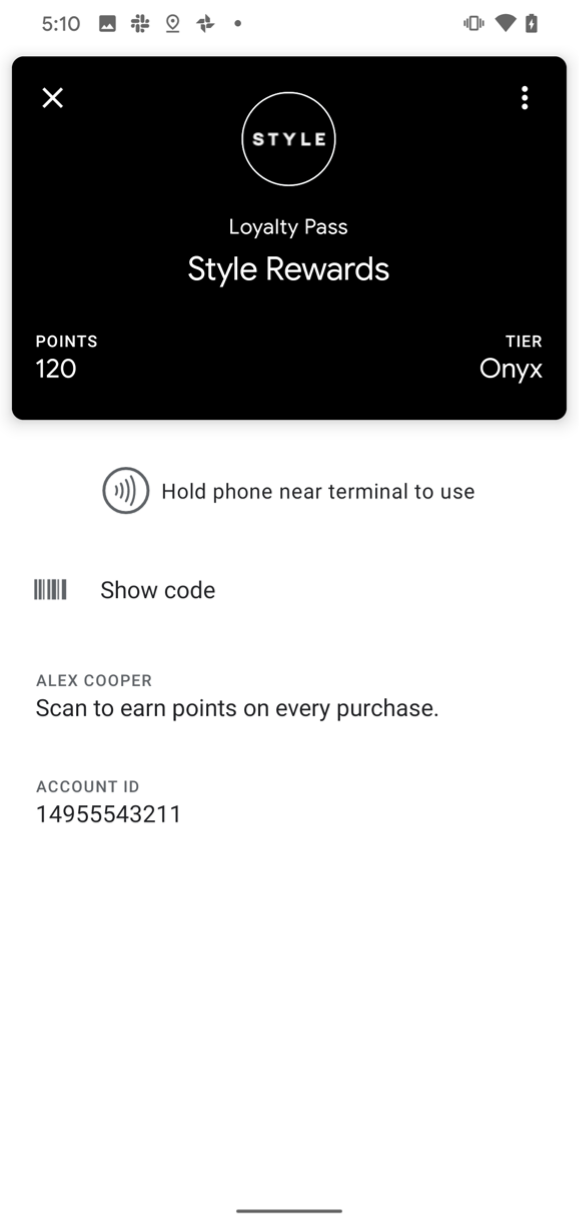
Google Pass Design
The Google Wallet pass goes through a similar transformation once you add a value for "Smart Tap Redemption Value.” The barcode type is replaced by an NFC icon and some directions around how to use the pass. There is also a "show code" link provided so that a user can access the classic barcode value in the event the NFC technology is malfunctioning.
Distributing NFC-Enabled Passes
Sending an NFC-enabled pass uses the same method as sending any other SmartLink. However, when delivering a pass, make sure that whatever field you used in your NFC Message or Smart Tap Redemption fields is included in the URL parameters.
In the earlier examples, this would have been done by passing along a URL parameter of "...data[loyalty_account_id]=example_value..." when delivering the SmartLink.
You may also update this same value using a batch file or API call.
Updated over 1 year ago