Adobe Journey Optimizer - Custom Event Journey
The Adobe Journey Optimizer integration allows you to trigger a Vibes SMS message to be sent to your contacts in the Journey Optimizer platform.
In this documentation, you will learn how to:
- Write a payload to be sent to the Vibes API
- Create personalized messages in Adobe Journey Optimizer
- Build a journey that includes a Vibes SMS send
Before you begin this integration, please ensure you the following prerequisites:
- Access to the Vibes Platform
- Access to Adobe Journey Optimizer
- An account with access to the Vibes Public APIs
If you do not have any of the above, reach out to your account representative for help.
Please note that Vibes is not a subject matter expert on Adobe Journey Optimizer. This tutorial will not tell you how to set up your account or how to import contacts. For help using Adobe Journey Optimizer, please reach out to Adobe customer support or view their documentation.
Step 1: Create the API-triggered message campaign in Vibes platform
In Campaign Manager, create a new API-triggered campaign. Set up the campaign as you normally would, except when you get to the Message portion of your campaign.
Instead of writing your message right in the Vibes platform, you will include a variable that will allow you to write and personalize the message_body in Journey Optimizer. You can also include a default message, which will be sent if the message_body in Journey Optimizer fails.
{{ ev.message_body | default: ‘Hello there!’}}

Before you leave the Vibes platform, go to your newly created campaign and find the Trigger. You will need this trigger when you write your payload.
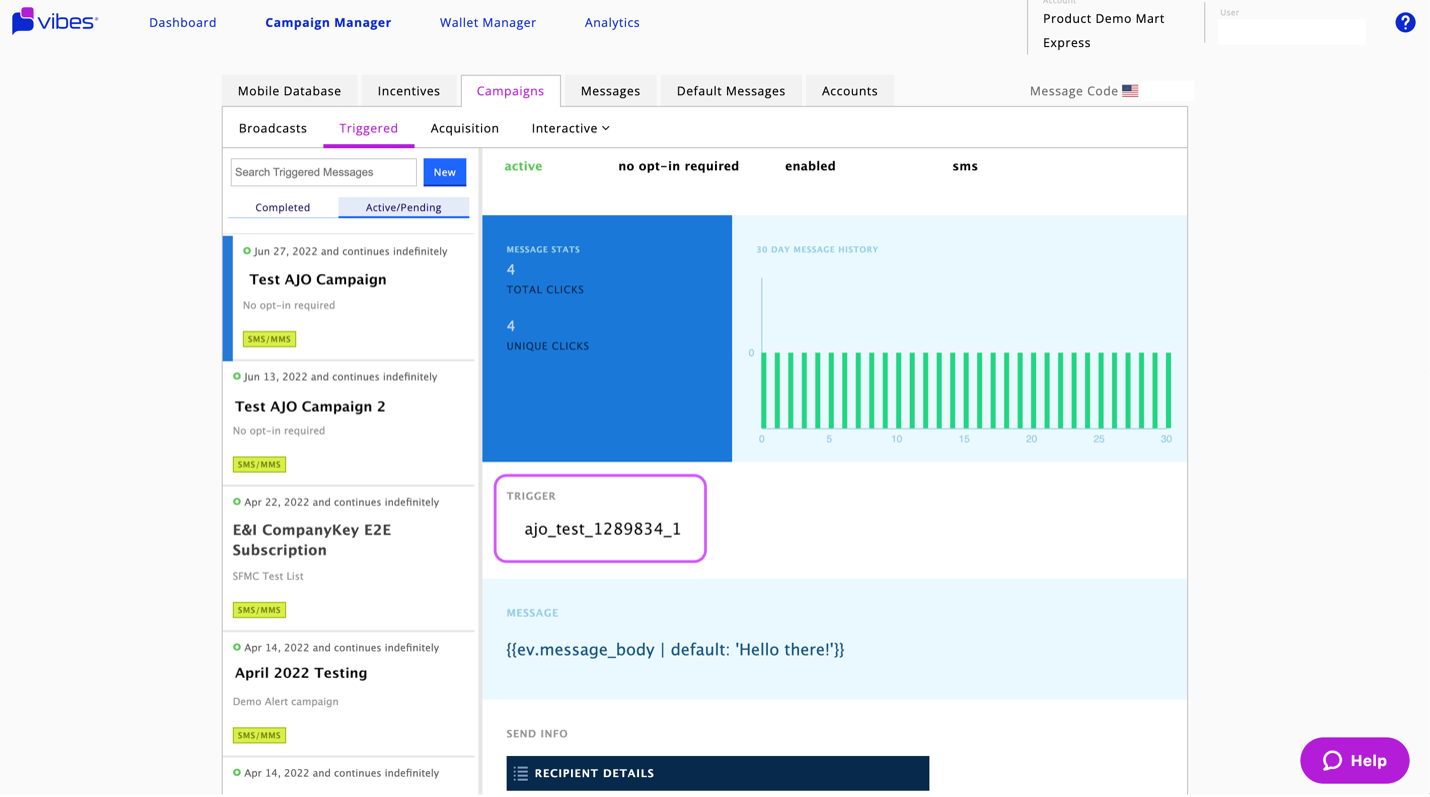
You can now exit the Vibes platform.
Step 2: Writing the payload
Before you set up your action and your journey in Journey Optimizer, you will need to write a payload. Because Journey Optimizer does not have an in-platform editor, this payload must be written in a third-party text editor.
Each payload can be customized to your needs, but below is an example of a basic payload.
{
	"event_type": "ajo_poc_4435345",
	"event_data": {
		"mdn": {
			"toBeMapped": true,
			"dataType": "string",
			"label": "Phone Number"
		},
		"message_body": {
			"toBeMapped": true,
			"dataType": "string",
			"label": "Message Body"
		}
	}
}
Below is a list of the required labels in a basic string.
| Element | Type | Description |
|---|---|---|
event_type | string | This element links the Journey Optimizer journey to the campaign you created in the Vibes platform. The string value should be equal to the “Trigger” value you found in the previous step. |
event_data | string | The wrapper element that includes all data. |
mdn | string | A required element representing the phone number which the message will go to. |
toBeMapped | Boolean | A Boolean that will determine whether or not this data is variable. Variable data must be mapped to corresponding data in Journey Optimizer. |
dataType | object | Defines the dataType of this element. |
label | string | Defines the label in Journey Optimizer. |
Step 3: Creating the action
Now you are ready to move into Adobe Journey Optimizer. Keep the payload you have just written handy, as you will need it shortly.
To trigger the Vibes message to be sent, you will need to set up an “action” that will call the Vibes API. The action will send the payload you wrote in the last step to the API, giving it the information it needs to trigger the message send.
- To start, go to Create Action. On the right, an action panel will be opened.
- In the URL field: add the URL to the Event Vibes API as shown below. The domain will depend on the region you are located in:
<https://public-api.vibescm.com/companies/:company_key/events> <https://public-api.eu.vibes.com/companies/:company_key/events> - For the Method, select POST.
- In the Authentication field: change to Basic and enter your Vibes username and password. Be sure this account has access to the Vibes Public APIs.
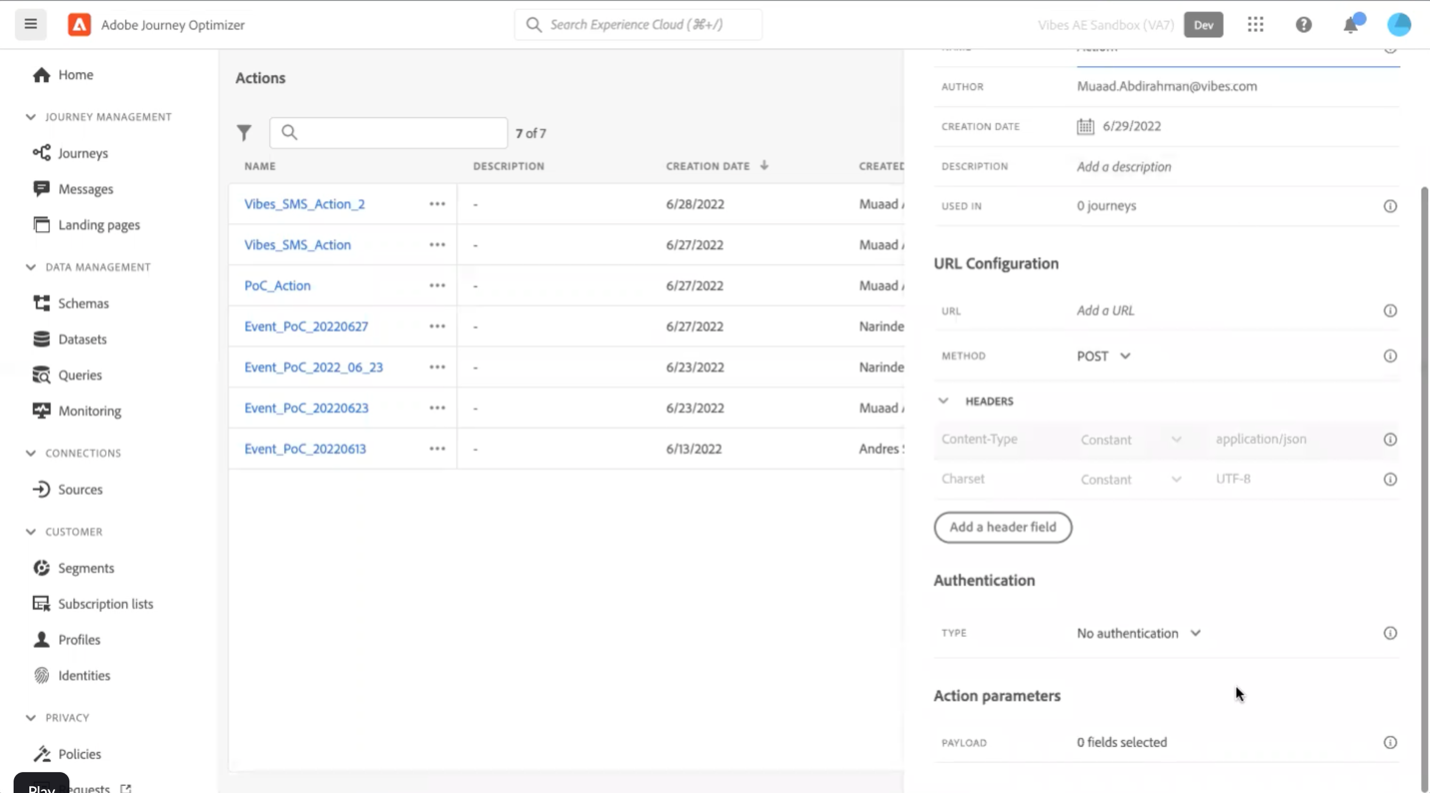
- Then, click into the payload.
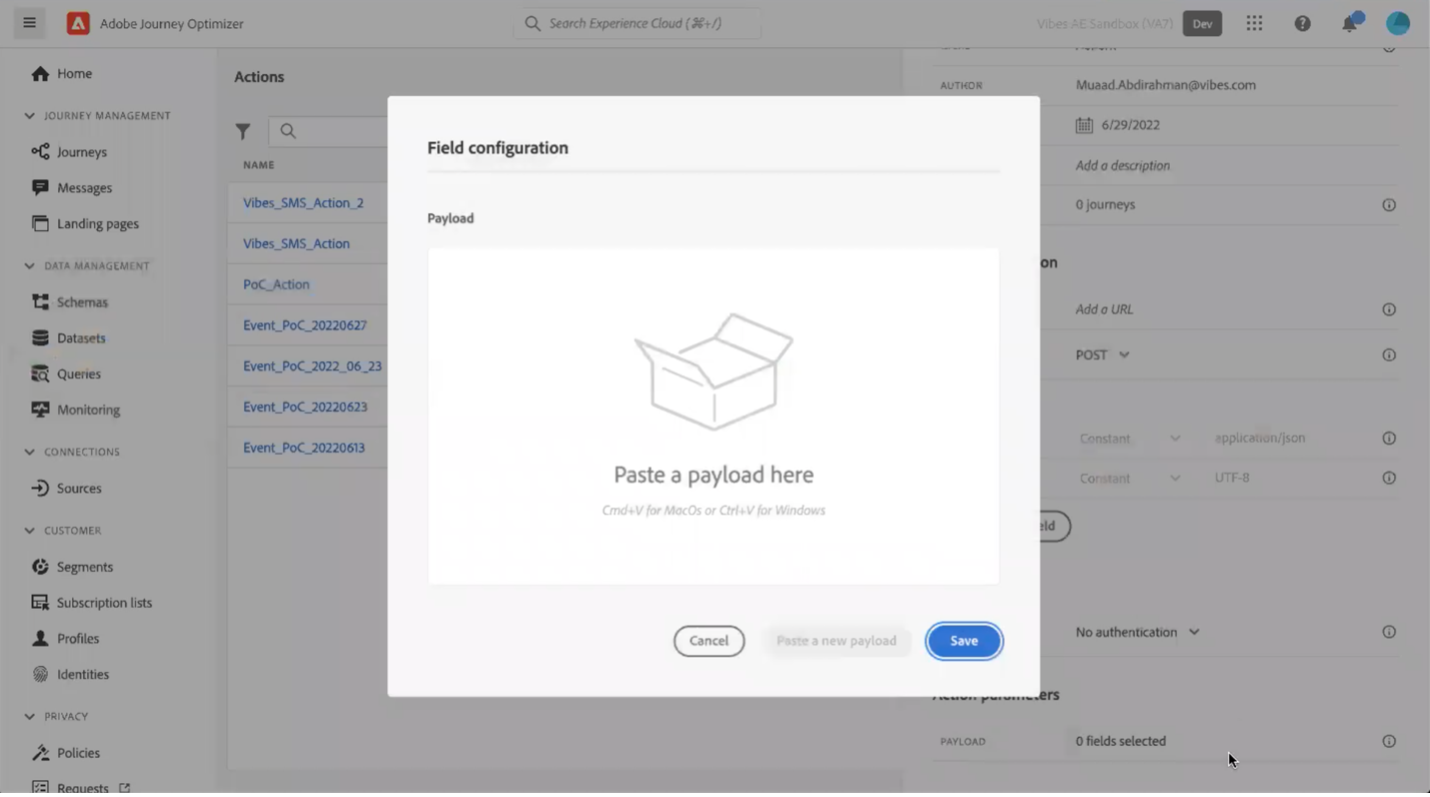
- Here’s where you will paste your payload from Step 2. If you have written the payload correctly, each field you included should appear.
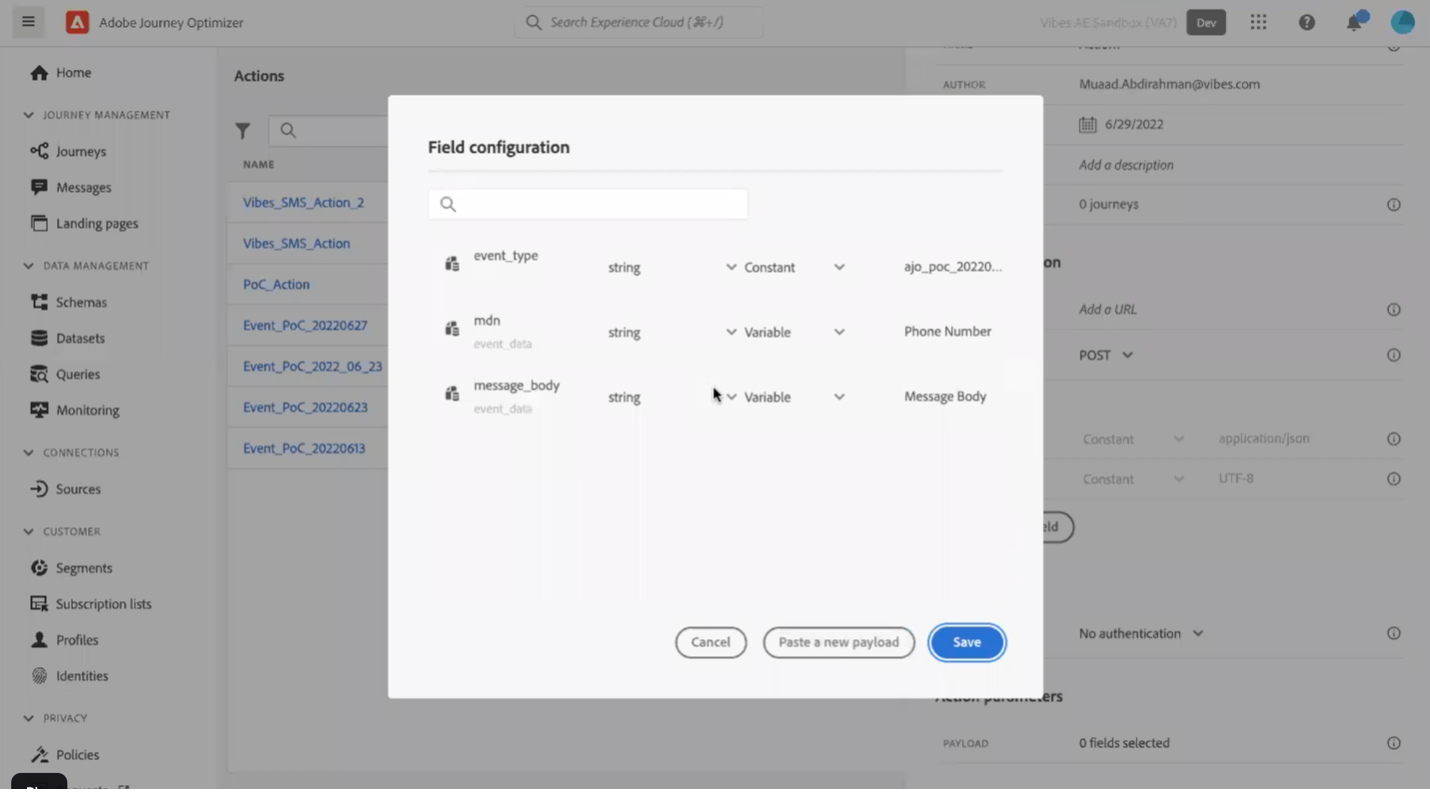
- Hit Save.
Your action is now ready for use. You can either save it and return to it later or begin the journey-building process as outlined below.
Step 4: Build your Journey
Now you are ready to start building your journeys.
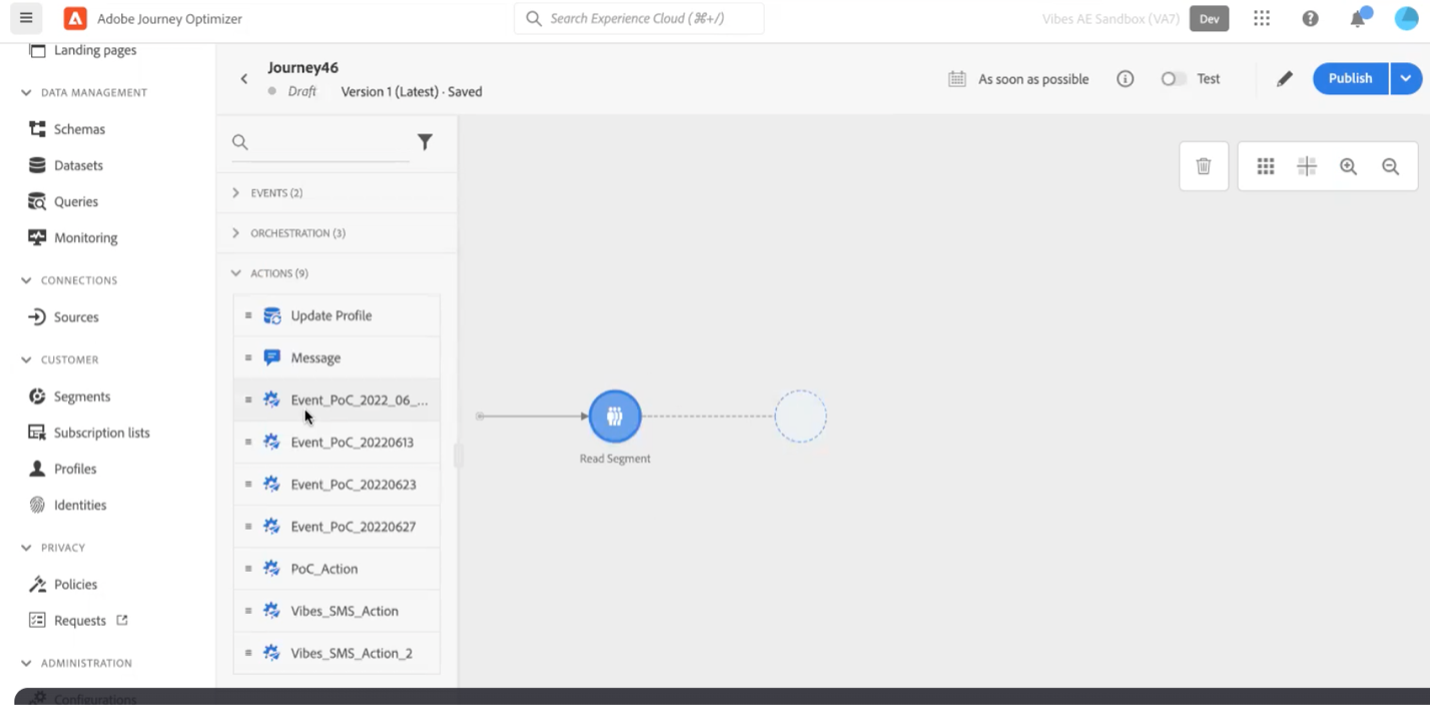
- Every Journey begins with a trigger. Choose the trigger you would like to use. Here are two examples:
- Event > Segment Qualification: This will send to the customer only when they first qualify for the segment.
- Orchestration > Read Segment: This will send to all customers in your selected segment.
- Select the actions dropdown. There, you should see the action you just created and be able to add it to your journey.
Step 5: Define your Fields and write your message
Once you have added the action the journey, the next step is to define the Action parameters. After you save, you will see these in the right panel.
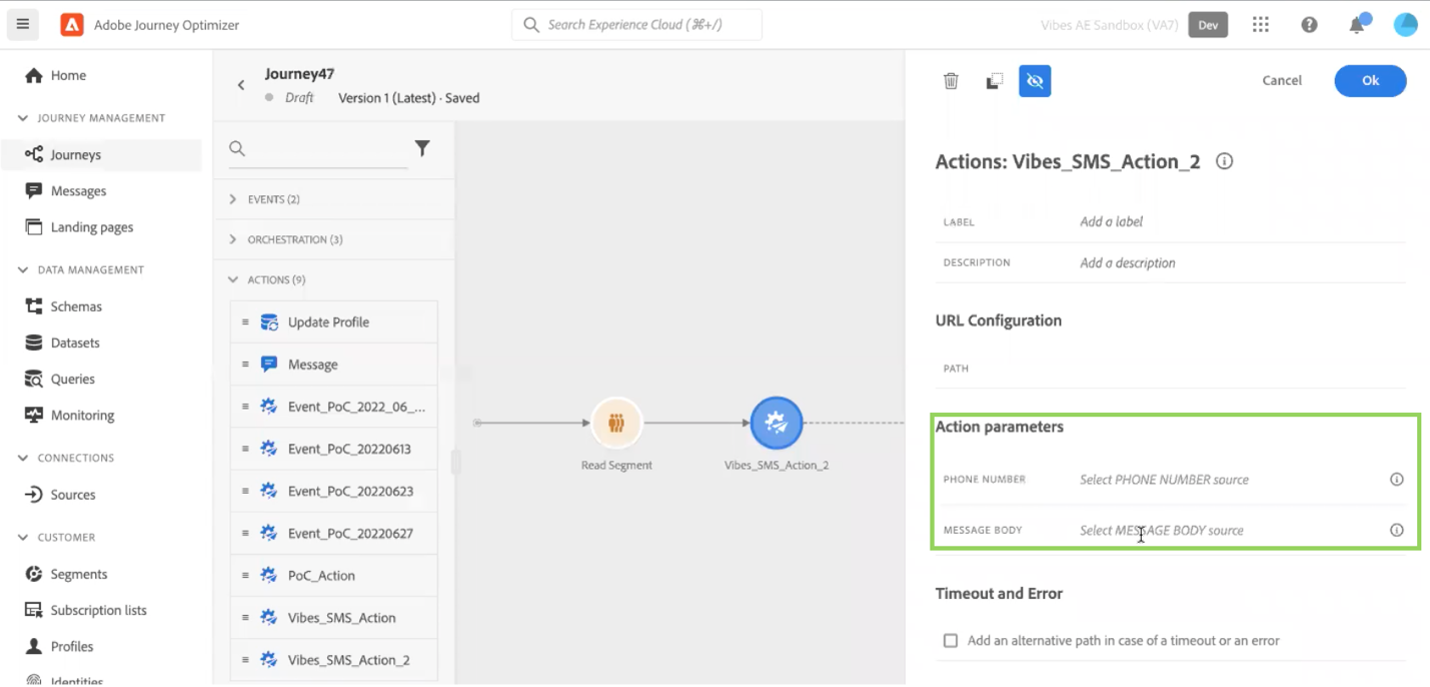
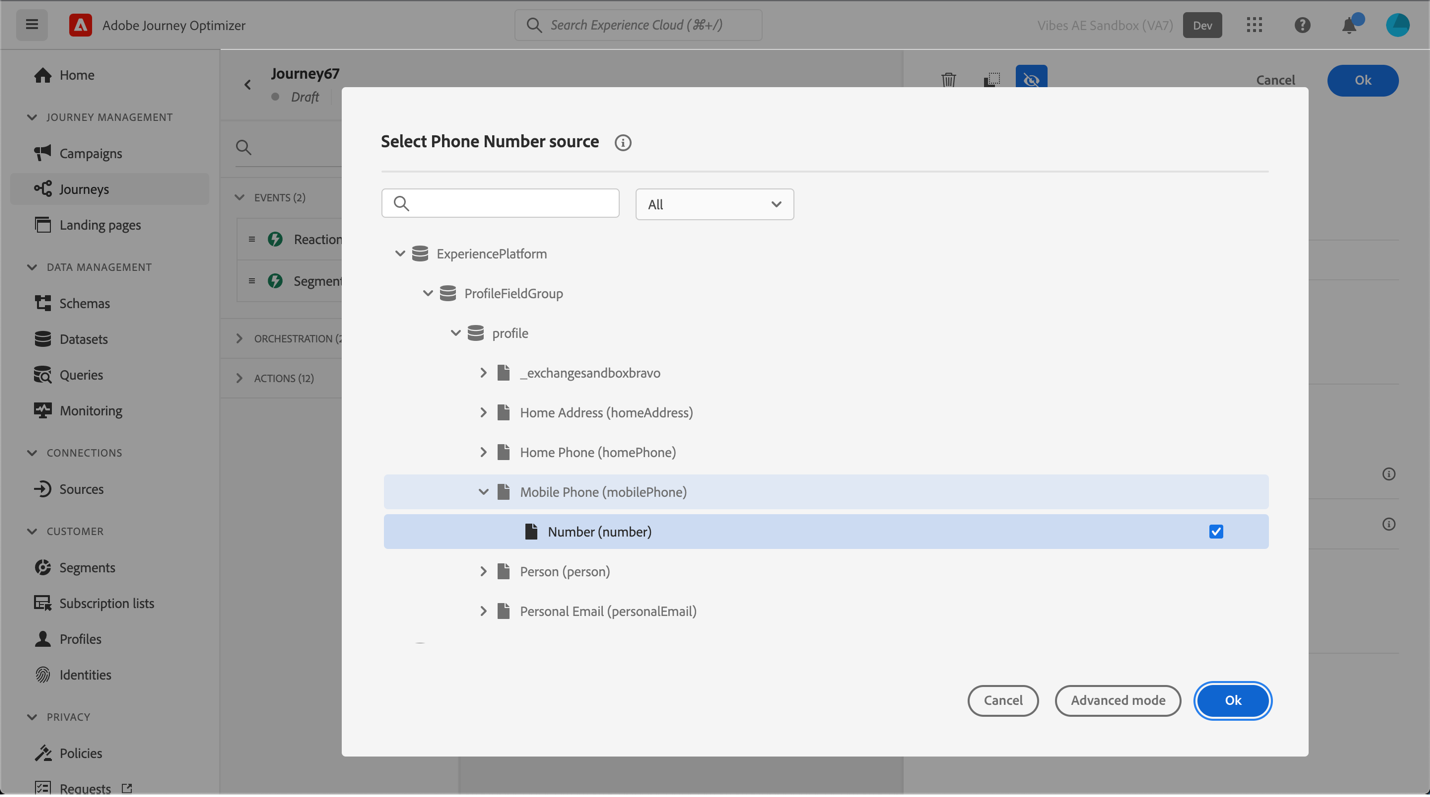
For the phone number and any other variable elements that you’ve included, click into the “select source” field. Then, choose the corresponding field from your schema. Please note that each schema may have different fields and labels.
When configuring message_body field, instead of selecting a field from the schema, go to “Advanced mode.” This will open a code editor.
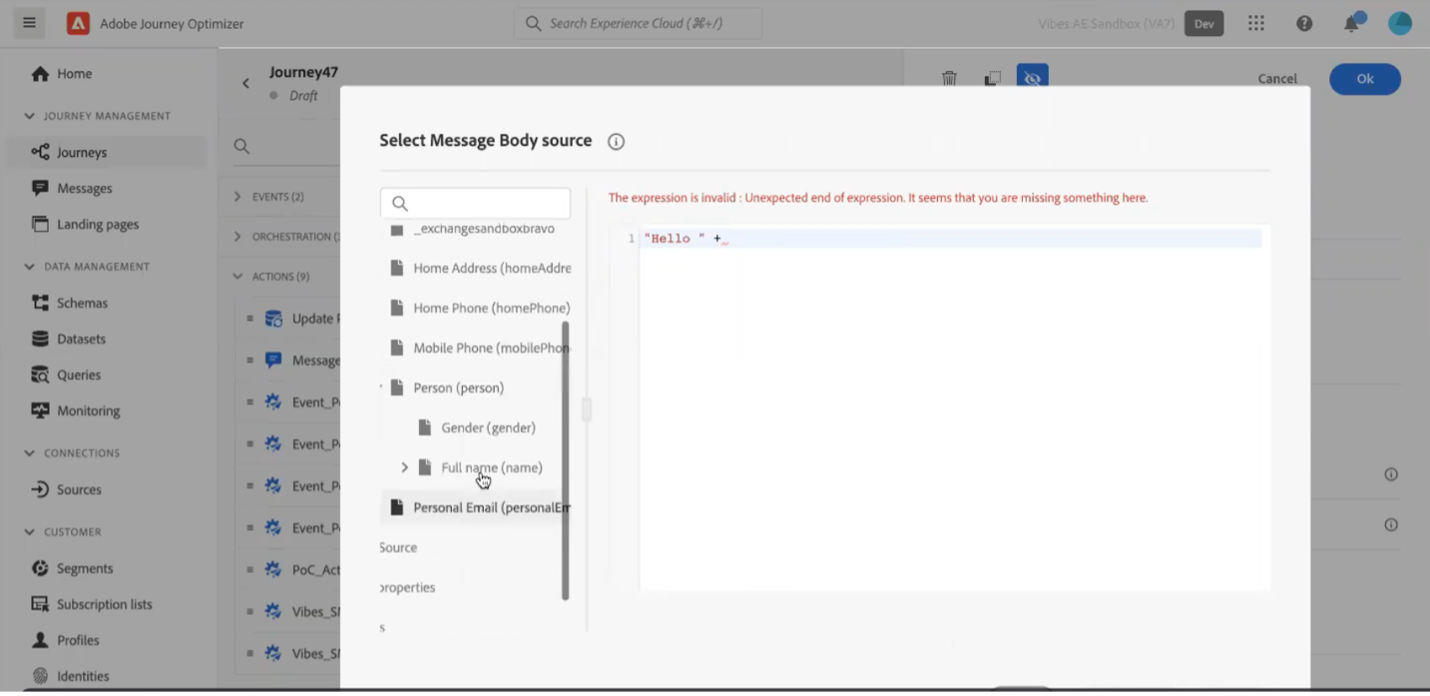
You can begin typing your message directly in this editor, surrounded by quotation marks. If you’d like to include variables, such as the customer’s first name or location, you can search for it on the panel on the left and include it by using the +.
Formatting Tips
Be careful to include any spaces, punctuation, and characters you’d like to include in quotation marks. If you do not include these, your message may not display correctly on the end device.
For example, if you wanted the message to say:
Hello, John! Here is your wallet link: https://vibes.com/examplelink
where the first name and smart link are both variable, your string may look something like this:
"Hello, " + #{ExperiencePlatform.ProfileFieldGroup.profile.person.name.firstName} + "! Here is your wallet link: " + #{ExperiencePlatform.ProfileFieldGroup.profile._exchangesandboxbravo.wallet_smart_link}
Important: The field values will vary based on how your schema is setup. Do not copy and paste this code into your Message Body source.
Congrats! Your Vibes event is now incorporated into your Journey Optimizer journey.